A CMS migration can either improve your SEO or destroy years of rankings—there is no middle ground.
If you’re planning to migrate from WordPress to Statamic, SEO should be treated as a first-class requirement, not an afterthought. The good news? When done correctly, a Statamic migration can improve performance, Core Web Vitals, and long-term SEO stability.
This step-by-step checklist shows exactly how to migrate from WordPress to Statamic without losing rankings, traffic, or authority.
Why SEO Migrations Fail (And How to Avoid It)
Most SEO losses during CMS migrations happen because of:
- URL changes without redirects
- Metadata loss
- Broken internal links
- Image path changes
- Poor post-launch monitoring
Statamic itself is SEO-friendly by design, but migration mistakes—not the CMS—cause ranking drops.
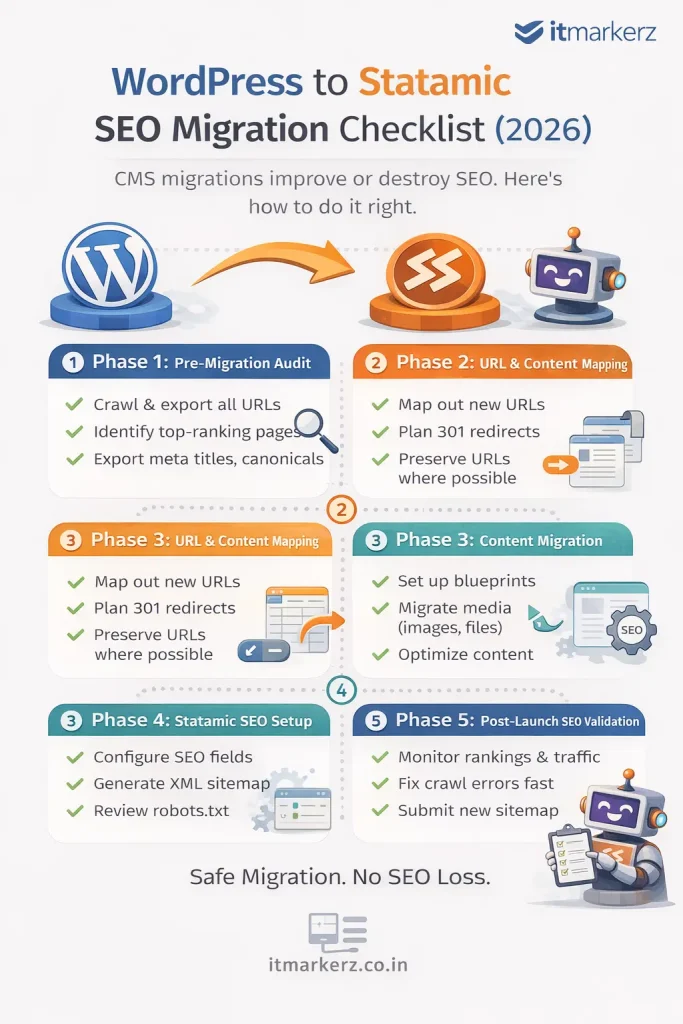
Phase 1: Pre-Migration SEO Audit (DO NOT SKIP)
Before touching Statamic, you must freeze and document your current SEO state.
✅ Crawl the Existing WordPress Site
Use tools like:
- Screaming Frog
- Ahrefs / Semrush
- Google Search Console
Export:
- All indexable URLs
- Status codes
- Canonicals
- Meta titles & descriptions
- H1–H6 structure
- Image URLs
- Internal links
This becomes your SEO source of truth.
✅ Identify High-Value Pages
Not all pages are equal.
Mark pages with:
- Highest organic traffic
- Best keyword rankings
- Backlinks
- Conversion value
These pages get extra protection during migration.
✅ Export SEO Metadata
From WordPress SEO plugins (Yoast / RankMath), export:
- Meta titles
- Meta descriptions
- Index / noindex rules
- Canonicals
- Open Graph data (optional)
👉 These will map directly into Statamic SEO fields.
Phase 2: URL & Content Mapping (Critical Step)
✅ Preserve URL Structure Wherever Possible
The safest SEO migration is:
Old URL = New URL
Example:
/services/wordpress-development → /services/wordpress-developmentStatamic allows full control over routing—use it.
✅ Create a URL Mapping Sheet
For every WordPress URL:
- Old URL
- New Statamic URL
- Redirect required? (Yes/No)
Even one missing redirect can leak SEO authority.
✅ Plan 301 Redirects
If URLs must change:
- Use 301 redirects only
- Avoid redirect chains
- Never rely on 302s
Statamic supports clean redirect rules via:
- Config files
- Web server rules (Nginx / Apache)
Phase 3: Content Migration into Statamic
✅ Rebuild Content Using Blueprints
Statamic uses structured content, not page builders.
Best practice:
- Create collections (Pages, Blog, Resources)
- Define blueprints with SEO fields
- Keep content clean and reusable
This improves:
- SEO consistency
- Content governance
- Long-term scalability
✅ Migrate Media Carefully
WordPress media URLs often look like:
/wp-content/uploads/2023/09/image.jpgDuring migration:
- Preserve filenames
- Avoid changing image URLs if possible
- Optimize images for size & format (WebP)
Broken images = broken SEO signals.
Phase 4: SEO Setup in Statamic
✅ Configure SEO Fields
Ensure Statamic templates include:
- Meta title
- Meta description
- Canonical URL
- Open Graph tags
- Twitter cards (optional)
Statamic’s clean HTML output is a major SEO advantage.
✅ Generate XML Sitemap
- Include only indexable URLs
- Exclude test pages
- Submit new sitemap to Google Search Console immediately after launch
✅ Robots.txt Review
Check:
- No accidental disallow rules
- Correct sitemap reference
- Crawlable assets (CSS, JS)
Phase 5: Pre-Launch SEO Validation
Before going live, test everything.
✅ Crawl the Statamic Staging Site
Confirm:
- All pages return 200
- Redirects work correctly
- Canonicals are correct
- No orphan pages
- No duplicate titles
✅ Compare Old vs New SEO Data
Validate:
- Title parity
- Description parity
- Heading structure
- Internal links
Your Statamic site should be SEO-equivalent or better than WordPress.
Phase 6: Post-Launch SEO Checklist (First 30 Days)
✅ Submit Sitemap in GSC
Immediately submit the new sitemap and request indexing for key pages.
✅ Monitor Rankings & Traffic
For the first 30 days:
- Watch impressions & clicks
- Track ranking volatility
- Fix crawl errors fast
Small drops are normal. Large drops indicate a missed redirect or index issue.
✅ Fix Issues Quickly
Common post-launch fixes:
- Missing redirects
- Noindex errors
- Canonical mismatches
- Broken internal links
Fast fixes = fast recovery.
SEO Benefits After WordPress → Statamic Migration
When done correctly, teams often see:
- Faster page load times
- Better Core Web Vitals
- Lower bounce rates
- Improved crawl efficiency
- More stable rankings
Statamic’s flat-file architecture removes many performance bottlenecks common in WordPress.
When You Should NOT DIY This Migration
Do not attempt a DIY SEO migration if:
- Your site gets significant organic traffic
- SEO is a primary lead channel
- You have complex URL structures
- You rely on organic revenue
In these cases, professional help pays for itself.
👉 Our Statamic Development Services include SEO-safe WordPress migrations, URL mapping, redirect strategy, and post-launch monitoring.
Final SEO Migration Rule
CMS migrations don’t hurt SEO.
Poor planning does.
With the right checklist, WordPress → Statamic migration can be a ranking upgrade, not a risk.
Leave a Reply